Microsoft Defender for Identity Deployment: My top 10 practical recommendations from real environments – Part 2
Welcome back to the series. If you missed the first half of my top 10 practical recommendations for real-world Defender for Identity deployments, you can catch up with Part 1 here. In this second part, we’ll pick up where we left off and dive into tips 6–10. The operational refinements that really strengthen visibility, reduce noise, and tighten control in complex environments. Let’s get into it.
6. Create multiple DSA accounts for separation of workload classes
Create dedicated gMSA accounts delegated as DSA accounts for each workload sensor type. Add these accounts to the Directory services accounts in https://security.microsoft.com/ > Settings > Identities
In an MDI deployment, the Directory Service Account (DSA) serves as the identity under which the sensor runs and authenticates to the domain. Its primary function is to allow the sensor to securely access domain resources, perform directory queries, and collect security-related telemetry from the host (e.g., Domain Controller, ADFS server, etc.).
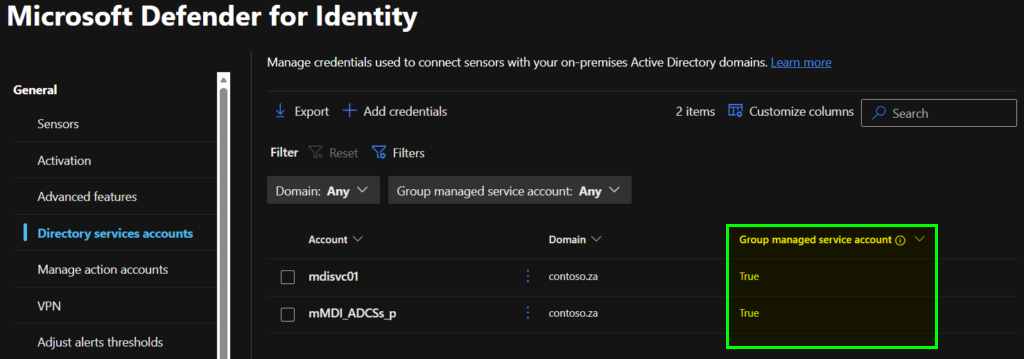
I recommend using using Group Managed Service Accounts (gMSAs) as DSA accounts. In this case the DSA account is a gMSA that provides automatic password management and simplified service principal configuration.
The DSA account must have the necessary permissions to read from Active Directory and access local event logs but should be scoped to the minimum privileges required for its role.
To align with Tier-0 hardening principles, I advise using separate gMSA accounts for each trust boundary or role, namely AD DS, AD CS, AD FS, and Entra Connect.
| Role | Sensor Location | Recommended Account |
| Domain Controllers | MDI DC Sensor | gMSA_DCs |
| ADFS servers | MDI ADFS Sensor | gMSA_ADFSs |
| ADCS servers | MDI ADCS Sensor | gMSA_ADCSs |
| Entra Connect Sync server | MDI Sensor | gMSA_Sync |
By tightly scoping the PrincipalsAllowedToRetrieveManagedPassword list for each gMSA, the attack surface is minimized, and compromise of one account only affects its associated sensor class. This separation respects the distinct sensitivity levels of Tier-0 workloads, reducing lateral movement risk and reinforcing a defence-in-depth strategy.
7. Manually tag sensitive users and devices
MDI uses entity tags to classify and monitor high-value assets within an Active Directory environment. These tags enable enhanced detection capabilities, such as lateral movement path analysis and sensitive group modification alerts. While MDI automatically tags certain entities[1], such as built-in privileged groups and Exchange servers, manual tagging is strongly recommended to ensure comprehensive coverage.
Manually tagging sensitive users, devices, and groups in MDI, such as Tier 0 admin accounts, security groups with elevated privileges, and VIP user accounts, ensures that critical assets beyond default privileged entities are properly classified.

[1] https://learn.microsoft.com/en-us/defender-for-identity/entity-tags?wt.mc_id=EM-MVP-5003430#default-sensitive-entities
Manually tag sensitive users such as Tier 0 admin accounts, devices belonging to VIPs and their user accounts. Set gMSA password retrieval groups as Sensitive groups.
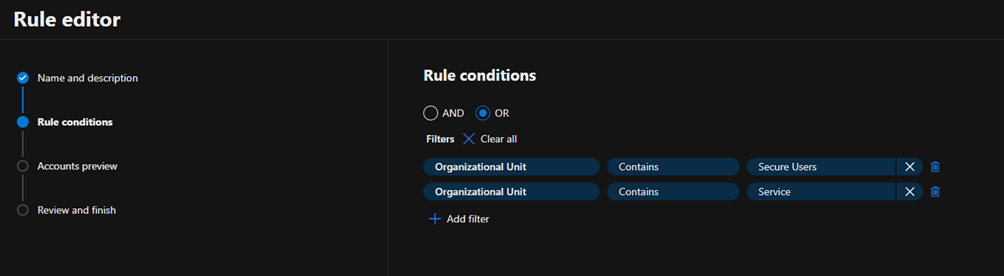
8. Create service accounts classification rules
Create Service accounts classification rules based on criteria that is specific to one’s organisational structure in Active Directory for example by including OUs
The Service Account classification in Microsoft Defender XDR, helps MDI distinguish between regular user accounts and service accounts. These accounts often require elevated privileges to carry out their functions.
MDI automatically discovers most Active Directory accounts services accounts. The auto discovery feature identifies gMSA, sMSA, and user accounts in that meet specific criteria, such as having a Service Principal Name (SPN) and an assigned password never expires attribute. But by defining custom classification rules, MDI can automatically tag service accounts based on attributes such as group membership, naming conventions, or organizational structure.
9. Configure VPN integration and NNR
If the VPN solution supports it, configure RADIUS Accounting in order to enrich the user activity information.
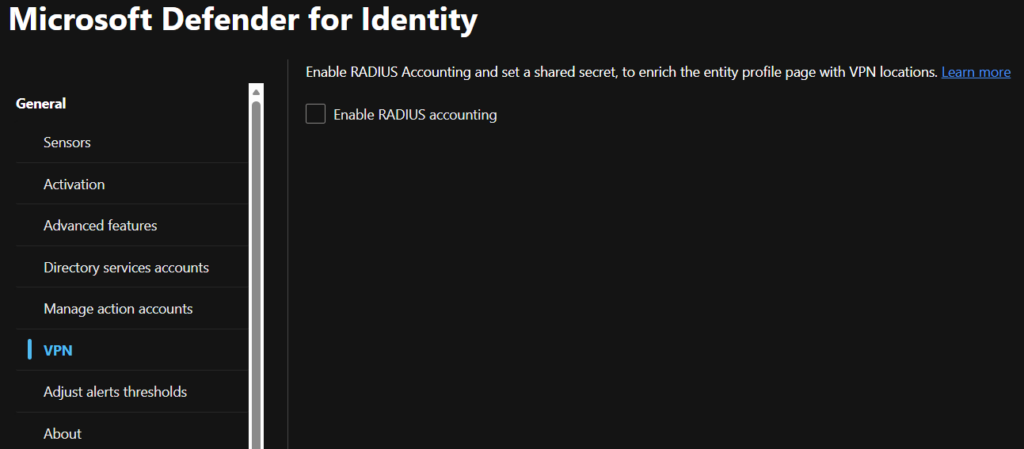
MDI offers integration capabilities with VPN solutions by monitoring RADIUS accounting events forwarded to MDI sensors, including details such as originating IP addresses and connection locations. Incorporating VPN accounting data enhances investigative efforts by supplying comprehensive information on user activity, such as connection origination points, and provides an additional means of detecting anomalous VPN connections.
Related to VPNs and corporate Wi-Fi networks, a common source of false positive “Suspected identity theft (pass the ticket)” alerts comes down to how Kerberos behaves when users move between different parts of the corporate network. Consider a device getting a Kerberos ticket on the wired network, and then the user switches to corporate WiFi or connects over VPN without renewing that ticket. The original IP address stays baked into the ticket, even though the device is now using another IP address. MDI uses network location as part of how it interprets authentication activity, so when a sensor sees traffic coming from one IP but maps the device name to another, it can look like someone is reusing a ticket on a different machine. In reality, it’s usually just normal roaming activity that creates a mismatch between the cached ticket and where the device currently lives on the network.
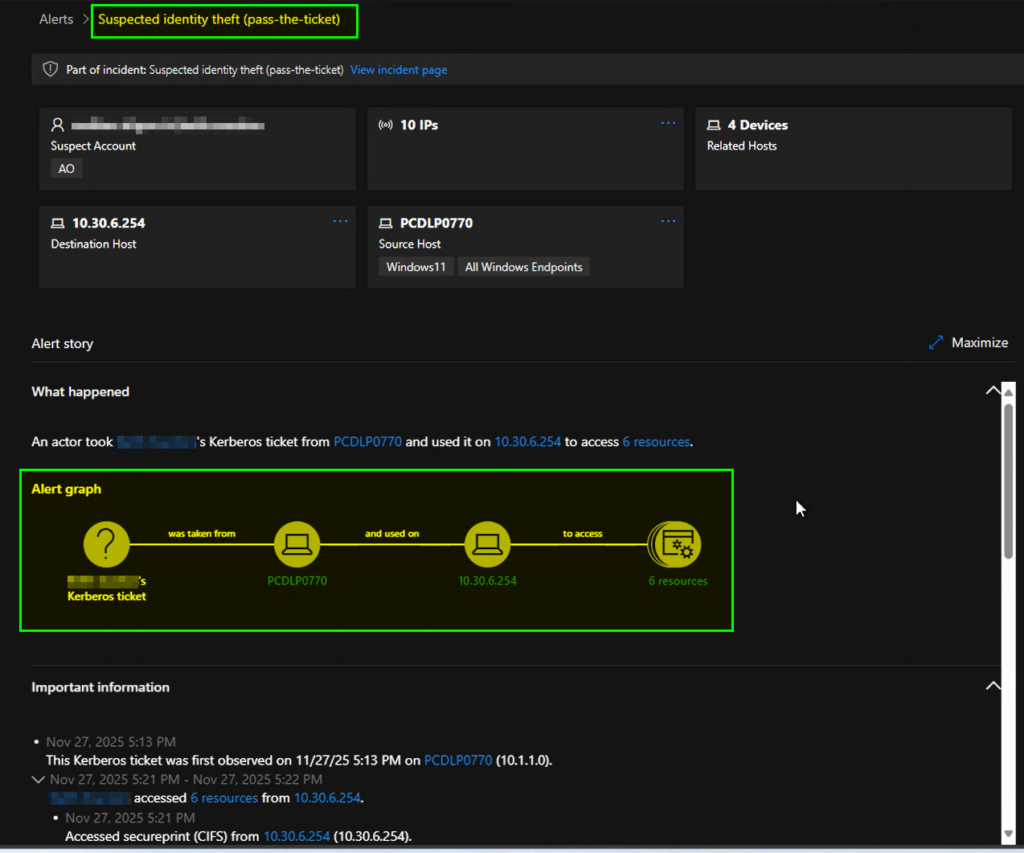
This is where Network Name Resolution (NNR) becomes critical. MDI sensors need to be able to perform name resolution using primary methods such as NTLM over RPC (TCP port 135), NetBIOS (UDP port 137) and RDP (TCP port 3389).

Without reliable NNR, MDI may struggle to reconcile roaming behaviour with cached Kerberos tickets, increasing the chances of lateral movement alerts being raised incorrectly. Ensuring that sensors can consistently resolve names, especially in environments with multiple corporate access paths, significantly reduces false positives and improves the fidelity of identity-based detections.
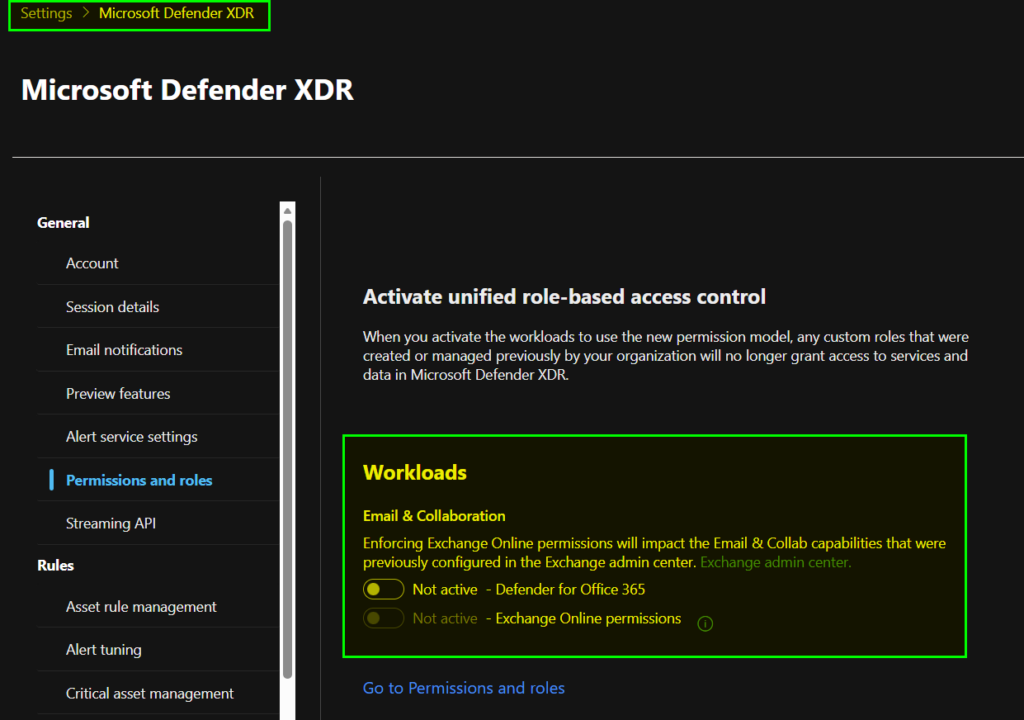
10. Create Defender XDR Unified RBAC roles
Create least-privilege role assignments in the Unified RBAC configuration, using either built in roles or custom roles.
MDI uses the Microsoft Defender XDR Unified RBAC model to manage permissions, providing a consistent and centralized approach to role assignment across the broader Defender security suite.
You can see if you are using the Unified RBAC model or the legacy roles by navigating to the Microsoft Defender XDR settings and then Permissions and roles. Here you will see the workloads that are active in the unified RBAC model and which are not. In the screenshot below, MDI is already active in the unified RBAC.
Roles are assignable to Entra ID Security Groups and support Privileged Identity Management (PIM) managed groups. Optionally, Role assignable groups are also supported.
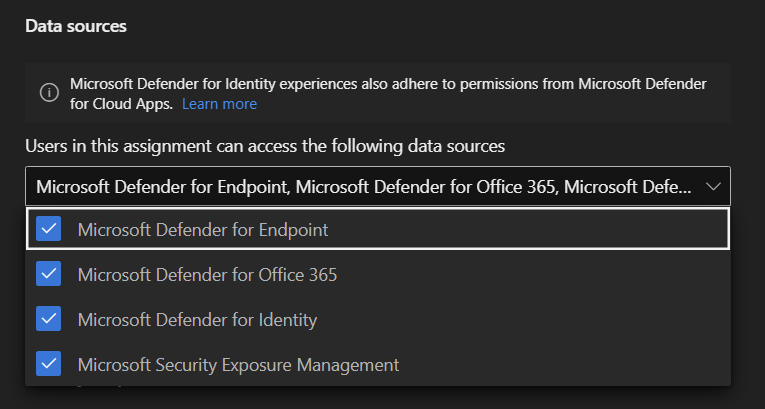
Once the workload has been onboarded, you can create role assignments across multiple Defender workloads, for example, a Security Analyst role may need read-only access to all the data sources:
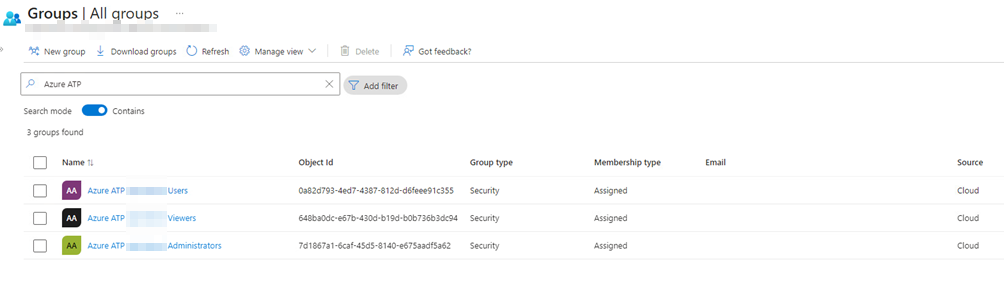
While your Defender tenant may still contain the legacy Azure ATP–prefixed security groups, these represent the older permission model and should be phased out in favour of Unified RBAC.
You can migrate these legacy permissions using the Map Microsoft Defender XDR Unified role-based access control (RBAC) permissions – Microsoft Defender XDR | Microsoft Learn article.
This brings us to the end of this two-part series. I’ve listed 10 practical tips for both implementing MDI for the first time or if you are reviewing an existing MDI deployment. If you’ve followed along through both parts, you now have a clear, practical checklist you can apply to your MDI environment.
Please let me know in the comments of any tips you would like to share and if these have been helpful.